
This program is distributed in the hope that it will be useful, but without any warranty ; without even the implied warranty of merchantability or fitness for a particular purpose . See the GNU General Public License for more details.
Welcome to Links, the most powerful web browser for professional work with the World Wide Web. The Links web browser combines ease of use, crystal clear pictures of exactly rendered video output, and the power and reliability of an HTTP requester and HTML parser written manually without compromises in C.
A new user interface unique to the Links web browser makes work easier and faster for people seriously interested in routine, fast, accurate and secure work with the World Wide Web. New functions like asynchronous DNS lookup and the possibility of smoothly enlarging images on the page make possible unprecedentedly quick movement in WWW space. Orienting on thumbnails in image search engines is made easier using this image enlargement technology. A simple and thorough system of interactive menus allows easy and unambiguous configuration of the browser with maximum possible security for sensitive data.
| prev | Contents | Installation |
The Links web browser has been conceived to fulfill the complex demands of today's low-level IT specialists.
The Links web browser posesses easily controllable powerful internal mechanisms for DNS lookup, HTTP requests, HTML parsing, decoding of image data streams, execution of Javascript and rendering of quality video graphics. The system ensures very high and accurate graphical power suitable even for demanding applications, like the presentation of medical data with high grey scale dynamics (such as X-ray images) in projection halls or previewing professional photography archives and presentation volumes from primary image data carriers in 48-bit colour depth corresponding to use of professional drum scanners. At the same time, it supports common display monitors or projectors with the standard colour depth of only 24 bits per pixel, even under unfavourable gamma conditions in the display chain. All web applications that involve image material may be exploited in a way that ensures an unusually high quality level in the graphics output and in accomodation to a particular user's working environment. Information loss can be prevented even at high processing speeds, exploiting the wide possibilities of the WWW interface.
The user interface in text mode is backward-compatible with the Lynx web browser; therefore users who have been using this browser until now can easily move on to Links.
The resampling subsystem of Links presents a typeface with unprecedented legibility even at extremely high numbers of lines per screen. Thanks to this, the use of the screen area can extend to the physical boundary of the specific monitor available to the user. Both reliability in reading and comfort at work are increased, and work output is maximized. A technology of adaptive convolution increases these benefits in areas of small interline pixel pitch.
On the other hand the resampling technology used brings finer letter contours at high interline pitches, reduction of the amount of font data necessary, and unusual flexibility in extending the unicode glyph set by national alphabetic or arbitrary pictorial symbols, independently of the source platform of the glyph image data. Moreover insertion of a glyph is possible without prior vectorisation directly from physical image carriers immediately after performing rasterization on the image acquisition device.
This unique technology (LPFFS) allows immediate and easy simultaneous integration of all browser components into the existing file hierarchy of the operating system. Thanks to LPFFS, the browser after installation takes the form of a single executable file into which all components necessary for running are already integrated. This avoids many problems during installation and possible uninstallation. Conflict-free installation of the browser is fostered in an existing file system while maintaining compatibility with the file system hierarchy standard (FHS) even on very large and complicated systems with remote directory tree sharing over a network.
Images, graphics and colour elements of HTML pages are processed in a highly standardized way, which ensures maximum reproducibility of the output on various imaging platforms and for diverse image formats. The video and typesetting subsystems complies to standards RFC 1867, RFC 1942, RFC 1945, RFC 2068, RFC 2109, RFC 959, RFC 1738, RFC 1808, RFC 1288, ITU T.81, CCIR Recommendation 601, JFIF 1.02, ISO DIS 10918-1, RFC 2083, IEC 61966-2-1, ISO 9241.
| Previous: Introduction | Contents | Next: Running Links in different environments |
Links is shipped as a source code tarball links-2.3.tar.gz . The source code is freely accessible on the web. For the installation we assume that you have one of the files links-2.3.tar.gz or links-2.3.tar.bz2 in your current working directory.
To install and run Links in text mode, the following basic programs are necessary:
For operation in graphics mode the following additional libraries are necessary:
If libtiff or libjpeg is not installed on your system, the browser will compile without TIFF or JPEG image support respectively. However, the libpng library is necessary for operation of the browser , as the internal fonts are stored in PNG format.
The following libraries are optional:
gzip -d links-2.3.tar.gz
tar -xvf links-2.3.tar
bzip2 -d links-2.3.tar.bz2
tar -xvf links-2.3.tar
cd links-2.3
./configure --enable-graphicsIf you want to compile the browser as a text-only version (without graphics support), write only
./configureThe configure program should find all necessary libraries on your system. In rare cases it can happen that some libraries are not found although they are installed (for example when you have an atypical installation). In this case you will need to enter the correct library path manually using compiler switches:
If you want to set up configuration script parameters in a more detailed way, the following command will show you all the possible parameters:
./configure --helpIf you need to set up special paths to header files and libraries before running the configure script, set up the following environment variables CFLAGS , CPPFLAGS , LDFLAGS. If you want, for example, to look for header files in the path /usr/ext/include and libraries in the path /usr/ext/lib , before running the configure script, write (in bash ):
export
CFLAGS="$CFLAGS -I/usr/ext/include" export CPPFLAGS="$CFLAGS
-I/usr/ext/include" export LDFLAGS="$LDFLAGS -L/usr/ext/lib"
Note: This advice is only for advanced users; if you aren't sure, ask your system administrator.
make
cp ./links /usr/bin/If you are installing the browser as a user, copy the file links into your home directory, into a sub-directory where you store executable files. For example:
cp ./links ~/bin/
cd ..
rm -r links-2.0.tar links-2.0
This completes the installation. Now it is necessary to calibrate the browser. If your browser is compiled for text mode only, skip the calibration procedure and go directly to the following section on the .links configuration file.
Run
links -g doc/calibration.htmlor possibly write a different path to the file calibration.html depending on where you copied the document.
If you are connected to the Internet, you can display the calibration directly from the Internet. Write on the command line:
links -gAfter seeing the welcome dialogue, close it by pressing ENTER , then press the key ESC or click the left mouse button on the bar on the top edge of the browser window. Then using the left and right arrow keys, move on to "Help" and press ENTER . Possibly click by mouse on "Help". Now using the up and down arrow keys, select "Calibration" and press ENTER or directly click on "Calibration".
On the screen you should see this picture:
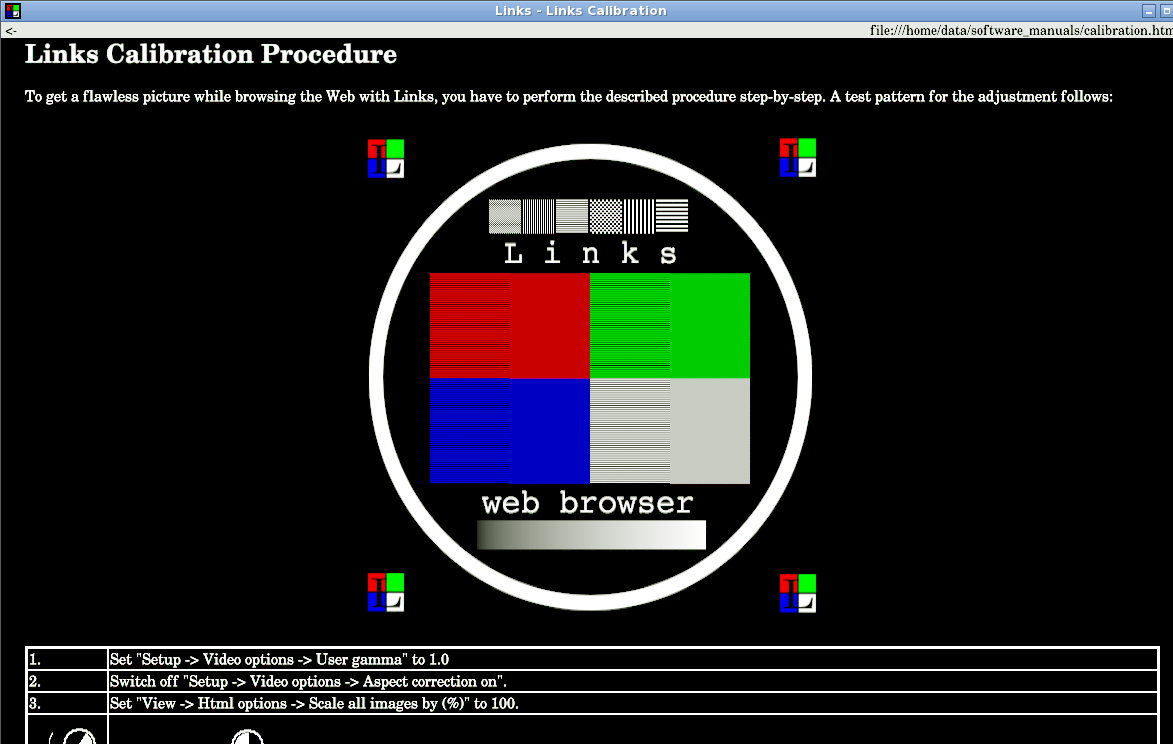
Now proceed exactly step by step according to the instructions on your screen.
When you run the browser for the first time, the .links directory will be created in your home directory, as determined by the $HOME system variable (or, if this doesn't exist, in the directory where the binary file links is stored). This created directory will be used for storing configuration files, bookmarks, history and more system information.
| Installation | Contents | The Links user interface |
This chapter provides basic information about launching the Links browser in text mode inside a virtual console or xterm, and in various graphical environments. In the following chapters you can find a detailed description how to control and run Links, including individual menu functions and browser setup.
The browser is easy to launch. Enter the directory containing the binary file links and type on the command line:
./linksIf the binary file is in your command path, you can launch Links from any directory. Just type on the command line:
links
You can, if you wish, include in the command the URL of the page you want to fetch, or a path to an HTML file on the local filesystem.
Example:
links www.altavista.comLinks will then open and immediately display the requested page.
You can enter options between the links command and any URL that you specify. These options control the running of the browser. They are written in the form -switch , where "switch" is the name of the option. The options are separated from the program name and from each other by spaces.
Some options demand a value or argument, which you must write after the option name and again separated by a space. The following table shows the most commonly used options and their meaning.
| Switch | Meaning | |
| -g | The browser will run in graphics mode. | |
| -mode | Sets the graphics driver mode (see below). | |
| -driver | Specifies a graphics system to be used. If you do not use the switch, the graphics system will be autodetected. | |
| -help | Prints out a summary of switches and keyboard control. | |
| -version | Displays the version number of the program. |
If you are running in a virtual console, rather than an xterm on your graphical desktop, you will need to have the gpm daemon running in order to be able to use the mouse. However the text mode in Links functions perfectly well without the mouse.
To enter graphics mode you have to use the -g option . Type on the command line:
links -g
Links will try to autodetect the graphic systems which you have installed on your computer. If it finds one, it will switch into graphics mode. Graphics systems will be searched for in this sequence: pmshell , x , svgalib , atheos . If you want to choose a graphics system manually, use the option -driver with one of the arguments: pmshell , x or svgalib .
For example:
links -g -driver svgalib
If you are using the X-Window system and detection fails, you will need to set up the environmental variable DISPLAY to point to your display.
The -mode option is used to pass parameters to the graphics driver. For SVGAlib systems, it is used to determine screen resolution. For the X-Window system it selects the display.
Grayscale modes are not supported, and nor are so-called "StaticColor" modes which do not allow the setting up of private colour palettes. If your display has several colour depths, the browser will choose the highest one. If you have a display with only paletted mode, the program will create its own colour palette, which will be set up on activation of the window and unset after deactivation.
In the X-Window system the -mode option sets the display for the output from Links web browser. The display is written down in the form
computer address:display number.screen numberIn the majority of cases the display number and screen number are zero. If it is a local computer, the computer address is an empty string. If you do not select the display using this option, the environment variable DISPLAY will be read. If it is not set, the browser will open on the display :0.0 .
Examples, what the command line may look like during running under the X-Window system:
links -g -mode delta.ether.net:0.0
links -g -driver x -mode localhost:0.0
links -g -driver x -mode :0.0
links -g -mode micron:1.0
In the first example the output of the browser will be displayed on the remote computer delta.ether.net . In the second case you explicitly say that the X-Window graphics driver should be used and the output should be displayed on the computer you run the browser on. The third case is equivalent to the second one. In the last example the output will be displayed on computer micron in local network, on display number 1.
In this case you use the -mode option to set the graphics resolution. To list all possible resolutions write:
links -g -mode help
Graphics resolution is specified in the form:
(width)x(height)x(colour depth)where width and height are dimensions of the screen in pixels and colour depth determines the number of colours. Possible colour depths are: 16 , 256 , 32K , 64K , 16M , 16M32 .
Example of graphics modes:
1024x768x16M
800x600x64K
320x200x16
1280x1024x32K
1024x768x16M32
640x480x256
If you want for example to run Links in graphics resolution 1024x768 and 16 million colours, write:
links -g -mode 1024x768x16M
If you are using Links under the Linux operating system, you can also run it graphically in the framebuffer. There is a limitation that only systems with linear memory mapping are supported. Another limitation is the mouse driver, which is implemented using the gpm library, in the interests of portability. As the gpm library was created for text mode, and graphics mode has much higher resolution, this would make the mouse too slow. Therefore the mouse pointer doesn't move smoothly but in steps of several pixels. In exceptional cases it is possible that a particular place on the screen will not be possible to click on. In this case you can use the F5 , F6 , F7 , and F8 keys for fine movement control of the mouse pointer.
This is not a bug in Links, but in the gpm library, which is character oriented. There is no other option for reading the mouse on the framebuffer. If you do not like this solution, please write to the authors of gpm and ask them to add graphics support to gpm .
If you have administrator rights, it is possible to change the source code of gpm for the mouse pointer to move smoothly, and then recompile gpm . Patch gpm with the patch included with Links, which you find in the same directory as the program; it is named PATCH-gpm-1.20.0-smooth-cursor . The patch has been created for source codes of gpm version 1.20.0. It will probably work for other versions of gpm too.
Links has the capacity to create so called virtual consoles on graphics systems such as the Linux framebuffer, where new browser windows cannot be created. After launching the browser, it is possible to create up to 10 virtual consoles which correspond to browser windows on a windowing system. You can switch between virtual consoles using the key combinations ALT +1 , ALT +2 to ALT +0 . If you create a new browser window (for example by using the function "New window"), a new virtual console will be allocated with lowest number available (after running the browser you are therefore on virtual console number 1) and the requested page will be displayed on it. If you close this window, the corresponding virtual console will disappear and the remaining consoles will remain as they are — they won't be renumbered as one might expect.
This technique allows users to view several pages in parallel even on systems where windows can't be created.
| Previous: Running Links in different environments | Contents | Next: Functions accessible through the menu system |
After launching, the web browser window is displayed. If you entered a URL on the command line, the requested page will be displayed directly. Otherwise you will see a plain gray screen. At the bottom edge of the window a status line is visible, where information about progress of the connection is displayed. The link address is also displayed here, when you point to a link with the cursor, as well as image titles and similar things. In the upper left corner there is a left-pointing arrow that allows you to move back to previous pages.
Before describing the interface in detail,we will clarify some terms that will later occur in the text:
Some mice have a scroll wheel instead of the middle button (we will talk about scrolling later). This wheel works as a middle button when you press it. When you roll the wheel, you scroll up and down. Mice with two wheels occur too — one instead of the middle button and one instead of the right button. The middle wheel (wheel 1) is used for vertical scrolling and the right wheel (wheel 2) for scrolling in the horizontal direction.
Warning: in some programs, clicking means double-clicking. In Links, the button always is pressed and released only once. If you press the button twice, it will be treated as two clicks.
protocol://server-address/path-to-document-on-server
Using URLs, HTTP documents (web pages) can be accessed as well as FTP directories and files on local disks. Examples of URLs:
http://www.google.com/
www.praha-mesto.cz
http://artax.karlin.mff.cuni.cz/~mikulas/links/index.cgi
ftp://ftp.gnu.org/ /usr/doc/HOWTO/Vim-HOWTO.txt
As is well known, HTML pages can contain separate frames. It is possible to switch between individual frames in text mode by using the TAB key and in graphics mode by clicking inside the frame.
Scrolling a page is simple too. In graphics mode you can scroll using the scrollbar situated on the right side of the frame. You can also scroll by using the arrow keys. The up arrow moves you up to the previous page and the down arrow to the next page. The PAGE UP and PAGE DOWN keys also take you to the previous or next page of the document. You can also scroll forward by one page by pressing the space bar. The HOME and END keys move you to the beginning or end of document, respectively. If you have a mouse with a wheel, you can scroll vertically in graphics mode by using this wheel. If you have a mouse with two wheels, the first wheel (usually in place of middle button) scrolls vertically and second wheel (usually in place of the right button) scrolls horizontally.
Even if you do not have a wheel mouse, you can scroll at any time by using the middle button: hold the middle button down and move the mouse as if you wanted to grab and slide the paper page by hand. This method works for shifting in both directions — horizontally and vertically. So if you hold the middle button and move the mouse to the right, the view will being moved towards the left edge of the whole page. With the mouse you therefore move in the opposite direction than with the scrollbar.
You can also move the page using the right mouse button but only when you do not hit an image, link, form element or similar. If you hit one of these with the right button, a menu of actions appears that can be performed with the image, link, or element.
In text mode the keys PAGE UP , PAGE DOWN , HOME , END and space work analogously. As the arrow keys are used for movement across links, the page is moved to the left and right by the [ and ] keys , and up and down by the INSERT and DELETE keys (or by CTRL +p a CTRL +n .
Note: If a page contains several frames, these methods move you within the current frame only.
Links are followed in graphics mode simply by clicking the link. In text mode, you first have to select the link using the up/down arrows. The currently selected link is highlighted in inverse video. If you want to follow the link, press the right arrow key or the ENTER key. Links are shown in blue, unless the page defines a different colour for the links.
When you click on a link, Links first looks up the address (sends a query to the DNS server). Then it starts establishing a connection with the remote server. After the connection is established, a request for the page is transmitted and Links then waits for the reply. The whole course of the communication is displayed in the status line at the bottom of the screen. As soon as the whole page is downloaded, "OK" will be displayed. If the page has not been completely downloaded, you can terminate the connection by using the "back" function in the File menu, by hitting the Z key (or, in text mode, the left arrow key), and also by clicking the left arrow in the top left corner.
Adter loading the page, the status line shows informations about links, images and other elements of page. If you move over a link, the address of the target is displayed (you can easily determine if something is a link by this method). If you move over an image, its title (alt attribute or URL of the image in case it doesn't have an alt) is displayed. After moving over a form element (text area, checkbox, radio button etc.) information about that particular form element is displayed (for example its name, value, address where the form will be sent to, ...).
If javascript is running on the page, it can also write into the status line. In this case the status line doesn't show the information described above but instead shows the text that javascript set.
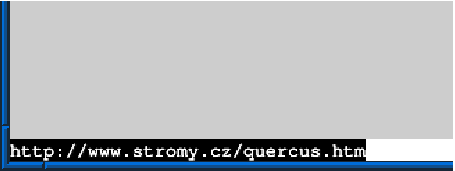
What a status line at the bottom edge of the screen looks like.
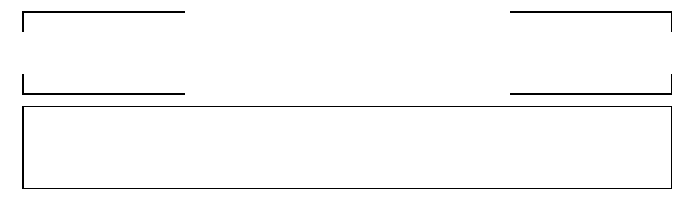
During downloading, an image not yet decoded is displayed as an empty frame the size of the image (as specified in the HTML code). After downloading and decoding the image, it will be displayed instead of this frame. If an error occurs such that the image cannot be downloaded (the image is damaged or it can't be displayed for another reason) a broken frame will be shown instead of the image. A frame has the dimensions of the image, where these are known. If they are not known, the frame has the basic dimensions 32x32 pixels.
The upper part of the image shows what a broken image looks like. In the lower part you see the empty frame for an image not yet downloaded.
Links only partially supports certain HTML tags, which can occur on a page. As some of these can contain important information, Links displays the following tags as links:
In text mode you can also encounter USEMAP or IMAP buttons, which are displayed instead of a clickable map image. After clicking on the button a list of links (which are in graphics mode under individual images) is displayed, from which you can choose the link you want to follow.
On some pages you can encounter a link Refresh linking to a different page. "Refresh" is redirection to a different page, which is performed automatically by some browsers. Links does not perform redirection automatically, because it can be very frustrating for the user who wishes to go back to the previous page; after pressing "Go back" she hits the redirect instruction and this will automatically direct her forward again. To avoid this, redirection is displayed as "Refresh" in Links. After clicking the link, redirection to the target page will be performed.
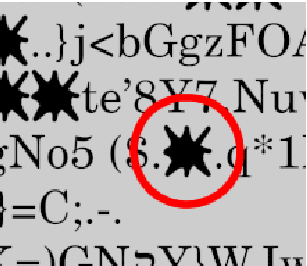
If some characters occur on a web page which Links doesn't have in its built-in font, a "blotch" character will be displayed instead of them. If there are too many blotches in the page and you think that the page should display correctly, try in "HTML options" menu in "View" to change the value of "Default codepage". It is possible that the server doesn't send information about code page and you just have a different encoding set as default. It is also possible that the server is sending wrong information about the code page of the document. In this case you can tick the entry "Ignore charset info sent by the server" in the same menu.
Instead of a missing character, a blotch symbol is displayed:
If foreground and background colours have luminances which are too similar, then a foreground colour will be selected with as much contrast to the background colour as possible. This function is built into Links to increase the legibility of text on pages that have unsuitable colours which make the text difficult for the user to read.
The whole Links program is controlled using interactive menus; control is therefore very easy and intuitive. All functions can be reached from the main menu, and additionally most can be launched by a so-called hot key.
You can invoke the main menu by pressing the ESC key or by clicking the mouse on the bar along the top edge of the window. You can close the menu by pressing the ESC again or by clicking underneath the bar. You select individual entries in the menu either by a direct mouse click, or by using the cursor keys — in the main menu the left and right arrow keys, and in pull-down menus the up and down arrow keys.
Activate your chosen function by pressing ENTER or the space bar.
Some menu entries have one character of the name highlighted in inverse video. If you press this letter when in the menu, a direct choice of this entry will be performed, which is usually faster than moving onto the entry with the text cursor or the mouse.
To the right of some entries a so called hot key is listed. If you press this hot key anywhere in the browser, the corresponding function will be directly called, which is again faster than looking for the function in menu. However, you don't have to remember hot keys — all the available functions can be reached through the menu.
Links dialogs are designed for functionality, not beauty. Memory and processor cycles are not wasted on pretty 3D effects such as buttons that move when you press them. The dialogs are designed to be equally easy to use with both keyboard and mouse.
Dialog windows are controlled in a way very similar to menus: up and down arrows select individual fields of the dialog, the spacebar activates the selected field (button, checkbox, etc). You can also of course use the mouse. Dialogs can be cancelled by using the ESC key. The dialog is closed and all changes are forgotten. On the other the ENTER key closes the dialogue and all changes will be accepted.
Dialogs often contain fields for entering text. Before doing so, you must activate the field (by either clicking it with mouse or selecting it using the cursor keys) — a text cursor will then appear in the field. After this you can normally insert text, numbers and so on. The left and right arrow keys move the cursor within the text field. The BACKSPACE and DELETE keys delete the text. CTRL +x erases the whole line and puts it into the clipboard (OS/2 only). Keys CTRL +v insert the clipboard contents (again only on OS/2). CTRL +u erases text from the cursor to the beginning of the line.
The up and down arrow keys allow you to browse the history of previously entered values. while the CTRL +w key combination activates a text autocompletion function. If you want to enter text that you have already entered previously, just a few leading characters can be typed and a previously used continuation will be filled in, or a dialogue is presented if there is more than one possible choice. The up and down arrow keys leave the text field and therefore end the edit.
All Links dialogs have two buttons at the bottom labeled OK and Cancel
By clicking on the OK key you confirm your entries. By clicking on Cancel you cancel them.
| Previous: The Links user interface | Contents | Next: Customising Links: the Setup menu |
Now we are going to show all functions of the browser in detail, as they are listed in the menu.
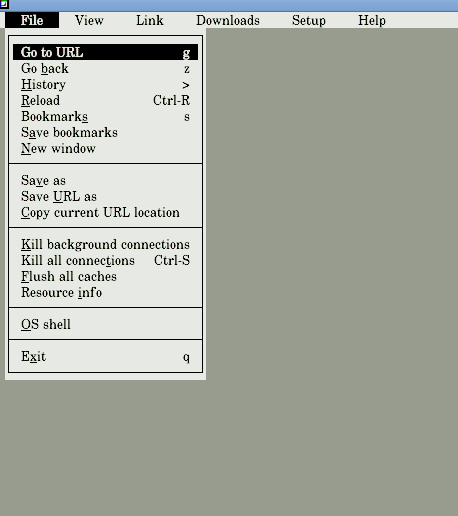
In the File menu you will
find functions for working with URLs: changing the current URL,
history, bookmarks, then functions for downloading documents, system
information, an operating system command line and exiting the browser.
![]()
During the first invocation of this function, this page will be requested again from the network. If there is a proxy server between you and the Internet, it can hapen that this proxy replies immediately from its own cache and will not download the document from network. Therefore second and further "Reload" invocations force downloading from the network even with a proxy cache. During second and subsequent "Reload", a "Pragma: no-cache" is actually present in the HTTP request.
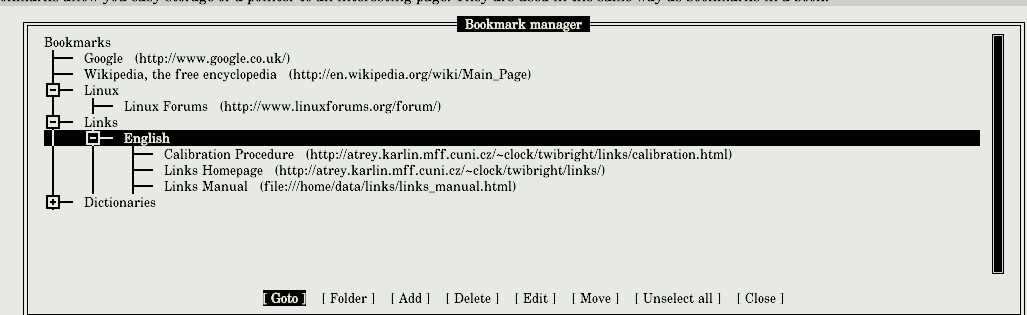
Bookmarks allow you easy storage of a pointer to an interesting page. They are used in the same way as bookmarks in a book.
The bookmark consist of a name (bookmark label) and a URL. Bookmarks are arranged in directories, which makes navigation easier and more comfortable. After invoking the "Bookmarks" function, a bookmark manager window appears on the screen. The upper part of the window contains a list of bookmarks and directories (or their names). Below this are buttons for managing the bookmarks.
Within the list in the upper part of the window, the cursor keys, and the PAGE UP , PAGE DOWN , HOME and END keys move the current selection (indicated by an inverse video bar). You can select an entry in this list as in a menu: use the up and down arrow keys, or click the left mouse button on the entry you want. PAGE UP or HOME move you to the top of the list, PAGE DOWN or END to the bottom.
Scrolling is performed by holding the middle mouse button and dragging the mouse up and down or by using the scrollbar at the right edge of the window.
To the left of every entry there is a graphics symbol that indicates whether it is a bookmark, an open directory, or a closed directory. A minus sign in a square means a closed directory, a plus sign in a square means an open directory and a longer horizontal line means a bookmark. Vertical lines show which directory the bookmark belongs to. You can open or close a directory by clicking the directory symbol or moving on to directory and pressing the space bar. Alternatively, the + key opens a directory, the - key closes it.
Now we will describe individual actions that can be performed using the buttons at the bottom of the window. These buttons work with the entry (bookmark or directory) that currently has the cursor bar. We will call this the current entry.
Entries in the list can also be moved. This function is performed by the Move button . First it is necessary to mark the entry you wish to move. An entry can be marked by the INSERT or * keys (these are toggle keys that mark an unmarked entry and unmark a marked one), or by clicking the right mouse button on the corresponding entry. The marked entry has an asterisk before its name (in text mode) or a little square (in graphics mode). Using the Unselect all button, you can deselect all entries. When a directory is closed, all entries inside the directory are automatically deselected.
When you have marked all the entries that you want to move, place the cursor bar over the entry behind which you want to move the selected entries, and click the Move button . The selected entries will be moved behind the current entry; if the current entry is an open directory, the entries will be placed into that directory. Moved entries will be in the same order as they were before the movement so that the sequence of selected entries will not change. Directories will be moved with their contents.
Bookmarks are stored in the file bookmarks.html in the .links sub-directory in your home directory. The format of the file is compatible with that used in Netscape, therefore it is possible to have common bookmarks for the Links and Netscape browsers. The path and name of the file where bookmarks will be stored can be selected in the "Setup->Miscellaneous Options" menu. In this menu you can also set up encoding of the bookmarks file. If you change the file or encoding of the bookmarks, the changes that you have made in bookmarks, will be automatically stored and a file with new bookmarks will be loaded.
Changes in bookmarks (for example addition or deletion) are automatically stored at exit of the browser. Therefore it is not necessary to save the bookmarks explicitly with the menu function. After the first run of the browser (when the bookmark file doesn't yet exist), a basic bookmark file will be created for you. This file will contain the Links home page and calibration page.
In svgalib and framebuffer graphics environments, instead of opening a new window, the lowest available free virtual console number will be assigned to a newly created virtual console. The requested page will be displayed on this console. You can switch between virtual consoles by using the keys ALT+0 to ALT +9 . If you close a console, it will disappear and the remaining consoles will remain as they are. They will not be renumbered.

The View menu contains functions for processing the currently displayed page: searching the document, switching between formatted and unformatted views, information about the document, and HTML settings.
During searches, case is usually ignored. This however is not the case with letters that carry accents. Accented letters will be searched for exactly as. written. Therefore don't forget this behaviour during entering the text.
For explanation we'll show couple of examples:

In this menu, various options for page display can be set. The menu contains the following entries:
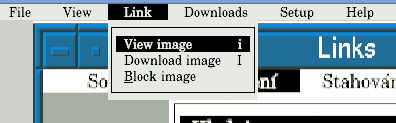
The link menu contains actions that can be carried out on the currently selected link — for example download, display image, and follow link. In graphics mode, this menu can also be displayed as a context menu by right-clicking on the link.
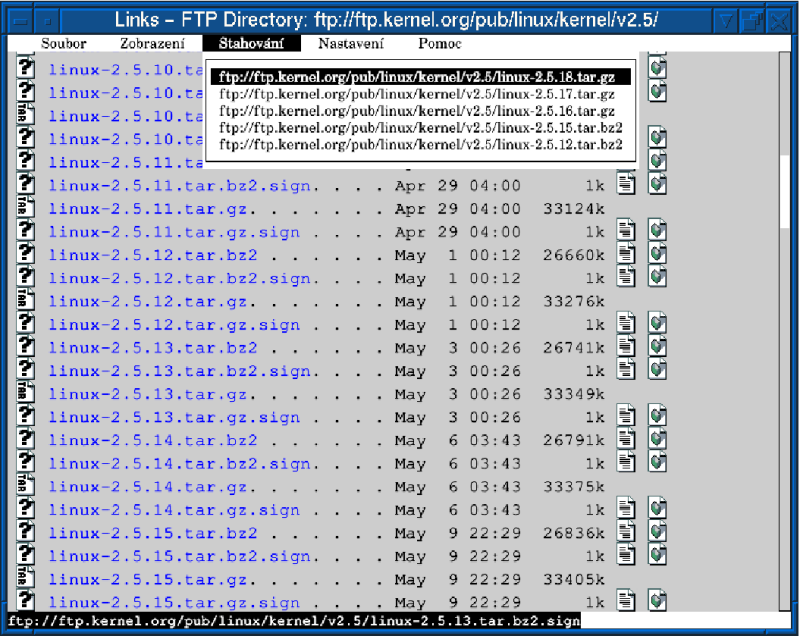
Contains an overview of files that are currently being downloaded in the background. After clicking one of the items, a window with detailed information and the option to interrupt is presented. In the following picture you can see the menu with selection of individual files being downloaded.
The following information is displayed in the window displayed for each file:
Thus a window with detailed information about a particular file looks like:
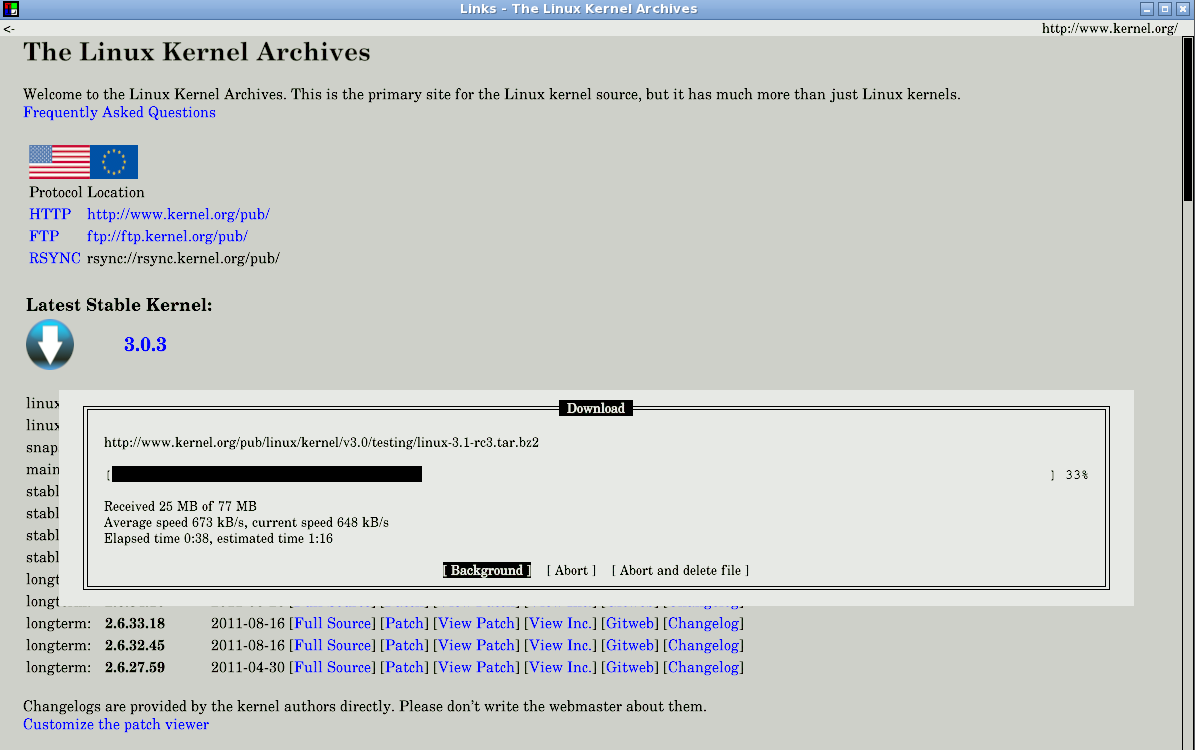
Clicking the Background button puts the download into the background again. The Abort button aborts the download. Abort and delete file aborts the download and also deletes the partially downloaded file.
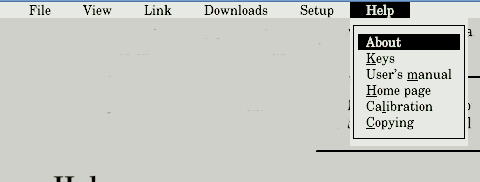
The Help menu contains helpful information on the program: a list of keyboard functions, an online manual and program licence information. The Keys entry displays a window with a list of hotkeys. After pressing the User's manual entry an online manual will be displayed (this works only if you are connected to the Internet). You can also visit the Links homepage by clicking the Home page . By clicking Calibration you get into the browser calibration procedure, which needs to be performed after first launching the browser. This function also requires you to be connected to the Internet.
| Previous: Functions accessible through the menu system | Contents | Next: Examples |
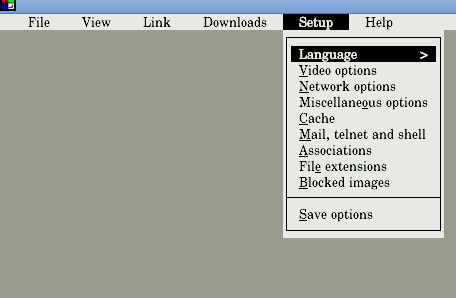
In this menu you will find all the global settings for the browser, for example language, character set (for text terminal only), network, terminal, cache, and similar. If you change any of these settings, don't forget to click the entry Save options , which saves the change into the configuration file. If you don't save the changes, they will be forgotten when the program closes down, and the old values will be used when the browser is started up next time.
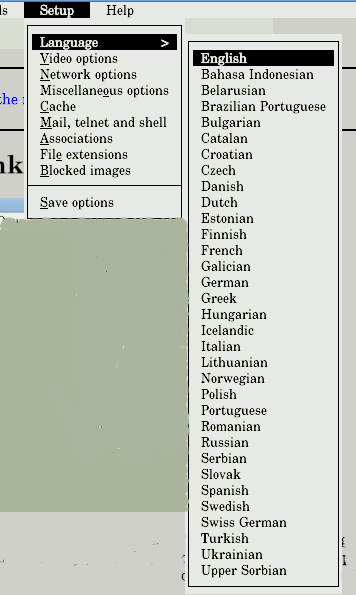
This menu allows you to select a language for the user interface. Up and down arrows select language, enter confirms the selection, the key ESC cancels the selection menu.
The "Video Settings" entry is available only in graphics mode. After clicking on it, the video setting window will appear. It is possible to set the gamma for your monitor, turn image and text dithering on or off, turn on aspect ratio correction or optimize for LCD displays.
The dialog contains fields for entering gamma correction value for individual colour channels (red, green, blue) and then user gamma for correction of ambient lighting. A description of correct gamma setting follows.

Setting the gamma correction
First it is necessary for you to set up contrast and brightness correctly
for your monitor according to the following instructions:
Now, having correctly set up your monitor, you can set the gamma correction:
Table of gamma corrections for various lighting intensities:
| Ambient lighting intensity | Illuminance (lux) | Gamma | |
| Projection room | 0 | 1.33 | |
| Darkened room4 | 1.22 | ||
| Dark room | 16 | 1.11 | |
| Usual illumination for a computer workstation | 64 | 1.00 | |
| Somewhat brighter workplace | 256 | 0.94 | |
| Brightly lit workplace | 1024 | 0.88 |
The Aspect ratio fields are for aspect ratio correction in graphics modes with non-square pixels. The usual ratio for cathode ray tube monitors is 4:3 (800x600, 1024x768, 640x480 etc.) With these resolutions, the pixels on the screen are square. With other resolutions (e. g. 640x400, 320x200) the pixels are elongated in one direction. So if you try to draw a square on the screen, you will see an oblong. The Aspect ratio option corrects this problem.
Fill in the field Aspect ratio with the ratio of monitor pixel width divided by monitor pixel height. So if the image is too narrow and tall, insert a number greater than 1, if too wide and low, set a number lower than 1.
In typical cases the default setting of 1 should be sufficient, because the graphics driver automatically determines the resolution and calculates a correction coefficient according to this, for a screen with 4:3 side ratio. If this is not enough (for example you have an atypical monitor), the coefficient has to be set manually.
By ticking up the field Aspect correction on you turn on the aspect correction. If the aspect correction is off, the pixels on screen are mapped 1:1 to pixels on the CRT/LCD.
To summarize: turn on the aspect ration correction, leave the value at 1 and try out with the calibration picture; if the circle is displayed as an ellipse, correct the shape by chaging the value. Increase if the picture is too tall and narrow, decrease if too low and wide.
Furthemore you can use this menu to set the output device for which the picture should be optimized. Tick up one of the following possibilities:
You can find the pixel sequence for your LCD in the technical manual or you can look with a magnifying glass or try out the options to find the best sharpness for small letters.
The LCD display correction is necessary because on an LCD display the picture elements are side by side so that the three separate images are shifted by 1/3 pixel. On a CRT this is adjusted so that the images fit exactly over each other.

In this dialogue you set parameters for network access.
HTTP and FTP proxy cache: if your network is behind a proxy server, it is necessary to set the address of your HTTP or FTP proxy server. If you don't know it, ask your network administrator. The address is inserted either as address or address:port . For example:
proxy.cache.intra
proxy.cache.intra:10000
If an HTTP proxy cache is configured, all HTTP requests will be set to the configured proxy using the given address and port. Similarly for FTP.
Furthermore various network connection parameters can be set:
The FTP options button invokes a dialog where you can enter a password for anonymous access to FTP servers. Some FTP servers require a password for anonymous access, usually your email address.
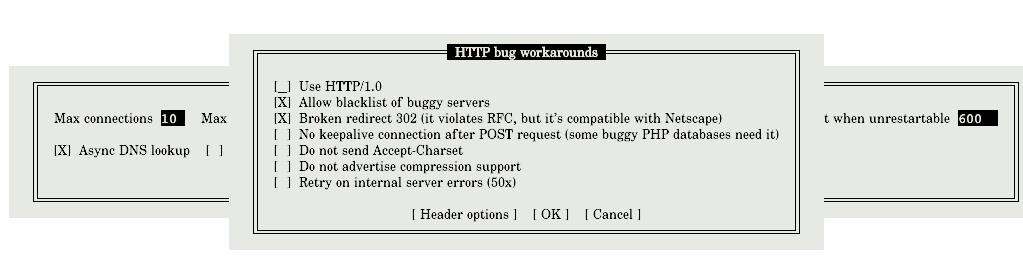
The button HTTP options invokes a dialogue for setting the properties of HTTP connections. In this dialogue you can set:
The Header options button allows you to set the refer information to one of the following possibilities. HTTP refer means that the browser sends information to the server telling from which page you got to the currently loaded page. However this is not secure, as you may wish to keep this information undisclosed. The following are your options:
You have the option to enter a text string into the Fake User-Agent field. This text will be sent to the server as user-agent. User-agent is a string giving information about your browser and operating system. By default true information about your operating system and the Links browser is sent. If you insert any text into this field, then this text will be sent instead and the server will never know your real operating system and browser. If you leave the field empty, the true user-agent will be reported.

In the "Miscellaneous options" dialog in graphics mode you can set the menu letter size. You can also set the file where bookmarks are stored and character encoding of the bookmarks.
Menu font size determines how big letters should be in the menu. The size is counted in screen pixels.
You can set colours for various parts of the menu: foreground , background , scrollbar , scrollbox , and scrollbar frame . All colours should be entered as hexadecimal triplets for the red, green and blue bytes. That is six characters, two for each component, chosen from the characters 0-9 , a-F . For example 00ff00 is bright green, 000000 is black, 444400 is dark yellow, a700a7 is light violet, ffffff is white and so on.
Bookmarks file is a file into which the bookmarks will be saved (see the section on bookmarks). The default is bookmarks.html in the .links directory in your home directory. This dialog allows you to change the bookmark file, for example when you want to share bookmarks with other browsers. When you are changing the bookmarks file the changes you have already made will be saved into the old file and the new file will be automatically loaded.
After clicking on Bookmarks encoding you will have an option to select the encoding in which the bookmarks file will be stored. Like changing the filename, a change in the encoding causes the pending changes to be saved into the old file in the old encoding and a new file in new encoding will be loaded.
If it is not possible to determine keyboard input encoding in graphics mode from the environment variables, this menu contains one more entry. The entry is a button marked Keyboard encoding . After pressing this button you will be presented with a choice of encoding in which your keyboard sends the characters. This setting is different for each graphics driver. For example you can have a different encoding for SVGAlib than for X-Window system. The encoding selection is always related to the graphics driver you are currently using.
In this dialogue you can set the cache size for document cache (in kilobytes) and number of formatted documents that can be stored in the cache. Maximum number of documents in the cache is 256.
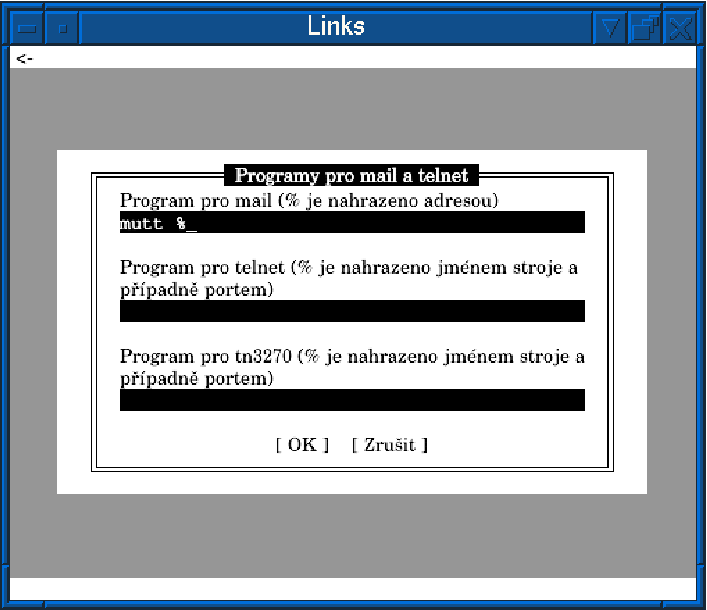
In this dialog you can set programs for mail and telnet. They are used for links like "mailto:", "telnet:", and "tn3270:". The dialog contains three text fields: program for mail, program for telnet and program for tn3270. Write commands which should be executed into these fields, the character "\" will be replaced by the address (for mail) or the name of machine and port (for telnet).
These two functions allow you to request execution of external programs for unknown file types. Each file received over the network has a so-called MIME type. This is a text string consisting of two parts separated by a slash (/). The part before the slash is the so-called main type (text, image, audio etc.). The part after slash defines the file format. For example when the main type is audio, the format could be MP3. In the table below you can find an overview of some widely used MIME types.
| Format | Description | MIME type | Extension |
| GIF | image format | image/gif | .gif |
| JPG | image format | image/jpg | .jpg |
| TIFF | image format | image/tiff | .tiff |
| PNG | image format | image/png | .png |
| PCX | image format | image/pcx | .pcx |
| BMP | image format | image/bmp | .bmp |
| AVI | video format | video/x-msvideo | .avi |
| MP3 | audio format | audio/mpeg | .mp3 |
| OGG | audio format | audio/x-ogg | .ogg |
| RealAudio | audio format | audio/x-pn-realaudio | .ra |
| Postscript | format for document transmission | application/postscript | .ps |
| format for document transmission | application/pdf | ||
| DVI | format for document transmission | application/x-dvi | .dvi |
| DOC | format for document transmission | application/x-doc | .doc |
The Links browser can display only text and images; however it allows you to choose external programs to be executed for other MIME types, for example for audio files. For this there are two functions. With "associations" you can specify an external program and the MIME types for which this program should be executed. With "extensions" you can assign MIME types to file extensions for cases where the MIME type is not known to Links or cannot be acquired from the server, but can be derived from the filename extension.
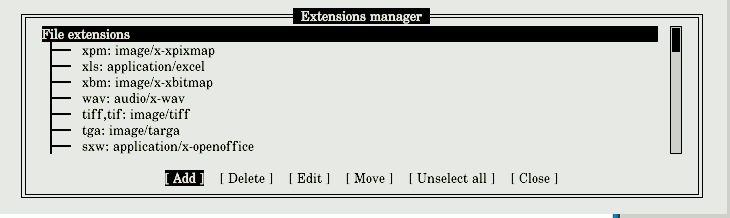
Both associations and extensions are managed using a dialog very similar to the "Bookmark manager" dialog. After invoking the "Associations" or "File extensions" function, a dialog labeled "Associations manager" or "Extension manager" appears.
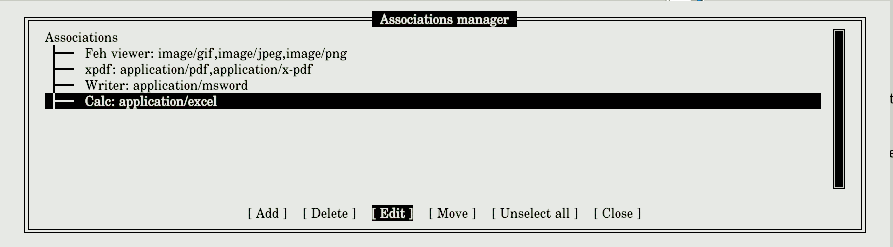
Working with the Associations manager and the Extensions manager is the same. Therefore we first describe the common elements, and then the dialogs for editing and addition, which differ between associations and extensions.
As in the bookmark manager, there is a list of extensions or associations in the top window. There are Add , Delete , Edit , Move , Unselect all and Close buttons at the bottom. Each extension or association shows a label and a mime-type after a colon which belongs to the association or extension.
It is possible to select an entry in the upper part of the window as you do in a menu. The selected entry is highlighted by an inverse video bar. You can move the bar with cursor keys and PAGE UP , PAGE DOWN , HOME , and END keys. Left and right cursor keys select the button (at the bottom of the window), pressing ENTER activates the button. Alternatively click on a button to activate it. You can scroll through the list by holding the middle mouse button and moving the mouse up and down. It is also possible to scroll with the scrollbar at the right part of the window.
Now we will describe individual actions that can be performed using the buttons. The buttons always have effect on the entry (extension or association) which is selected by the cursor. We will call this entry the current entry.
It is also possible to rearrange the entries in the list. This is what the Move button is for. First it is necessary to mark the entries we want to move. An entry can be marked by the INSERT key or * . These are toggle keys which unmark a marked entry and mark an unmarked one. It is also possible to mark entries by clicking the right mouse button on the entry. A marked entry has an asterisk in front (in text mode) or a square (graphics mode). If you press the Unselect all button, all entries will be unmarked.
When you have all the entries marked that you want to move, move the cursor bar to the entry behind which you want to move the entries. Then press the Move button. The marked entries will be moved to just after the current entry. The marked entries will be in the same sequence as they were before the move (this means the relative sequence of the marked entries is unchanged).
Associations
The dialogue for editing and adding new associations looks like this:
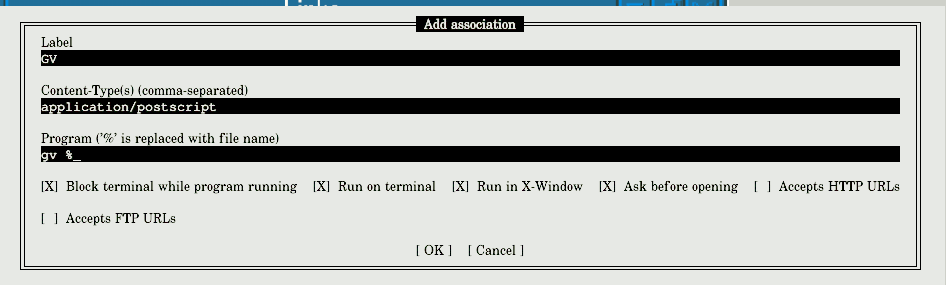
Here are example of MIME type settings:
Label: ZGV
Content-Type(s): image/gif,image/jpg,image/pcx,image/bmp,image/png
Program: zgv %

Label: Acrobat
Content-Type(s): application/pdf,application/x-pdf
Program: acroread %

Label: MP3
Content-Type(s): audio/mpeg
Program: mpg123 -2 -v -b 500 %
Of course you can set more programs for a single MIME type (for example multiple PDF viewers). If you set more program, a dialog will be presented before executing the external program, where you can select which of the programs should be executed.
File extensions
This function allows certain file extensions to be bound together with a
concrete MIME type. The extension is used in the case when it is not
possible to determine the MIME type from a server. The type is then determined
from the filename extension.
Editation and addition of a new extension invokes a dialogue into which
you enter a list of extensions (without the dot) separated by commas, and
a MIME type on which these extensions should be mapped. So for example:
Extension(s): gif
Type: image/gif

Extension(s): pdf
Type: application/pdf

Extension(s): dvi
Type: application/x-dvi

Extension(s): jpg
Type: image/jpeg
If you are running the browser for the first time, extensions for basic file types (images, graphics formats, documents, music files, animations etc.) will be automatically created.
Saves the settings into the configuration file. If you change some setting
and don't save the settings later, then the change will be forgotten when
the browser is exited. Therefore do not forget to save the setting if you
change something and want it to be kept for the next execution of the
browser.
The URL entry line is utterly impractical because the user has to try
laboriously to hit it with the mouse. Pressing one key more (to invoke the URL
entry dialogue) is much more practical and faster. The dialogue takes up
screen space only while entering URLs.
When Links was created, one of the main differences from
Lynx was that Links supported JavaScript, even in
text mode. It was controlled
by the JavaScript 1.1 specification from Netscape Corporation.
However JavaScript support
was removed in release 2.1pre29 because it was buggy. In case it
is restored, this appendix contains information on how to use it. The
material in this appendix is not currently valid.
To compile Links with JavaScript support, use the configure option
--enable-javascript.
When JavaScript is enabled, this option appears in the Setup menu.
In this dialogue you can set up various parameters of the javascript
interpreter.
Copyright (C) 1989, 1991 Free Software Foundation, Inc.59 Temple Place, Suite 330,
Boston, MA 02111-1307 USA
Everyone is permitted to copy and distribute verbatim copies
of this license document, but changing it is not allowed.
The licenses for most software are designed to take away your
freedom to share and change it. By contrast, the GNU General Public
License is intended to guarantee your freedom to share and change free
software — to make sure the software is free for all its users. This
General Public License applies to most of the Free Software
Foundation's software and to any other program whose authors commit to
using it. (Some other Free Software Foundation software is covered by
the GNU Library General Public License instead.) You can apply it to
your programs, too.
When we speak of free software, we are referring to freedom, not
price. Our General Public Licenses are designed to make sure that you
have the freedom to distribute copies of free software (and charge for
this service if you wish), that you receive source code or can get it
if you want it, that you can change the software or use pieces of it
in new free programs; and that you know you can do these things.
To protect your rights, we need to make restrictions that forbid
anyone to deny you these rights or to ask you to surrender the rights.
These restrictions translate to certain responsibilities for you if you
distribute copies of the software, or if you modify it.
For example, if you distribute copies of such a program, whether
gratis or for a fee, you must give the recipients all the rights that
you have. You must make sure that they, too, receive or can get the
source code. And you must show them these terms so they know their
rights.
We protect your rights with two steps:
Also, for each author's protection and ours, we want to make certain
that everyone understands that there is no warranty for this free
software. If the software is modified by someone else and passed on, we
want its recipients to know that what they have is not the original, so
that any problems introduced by others will not reflect on the original
authors' reputations.
Finally, any free program is threatened constantly by software
patents. We wish to avoid the danger that redistributors of a free
program will individually obtain patent licenses, in effect making the
program proprietary. To prevent this, we have made it clear that any
patent must be licensed for everyone's free use or not licensed at all.
The precise terms and conditions for copying, distribution and
modification follow.
0) This License applies to any program or other work which contains
a notice placed by the copyright holder saying it may be distributed
under the terms of this General Public License. The "Program", below,
refers to any such program or work, and a "work based on the Program"
means either the Program or any derivative work under copyright law:
that is to say, a work containing the Program or a portion of it,
either verbatim or with modifications and/or translated into another
language. (Hereinafter, translation is included without limitation in
the term "modification".) Each licensee is addressed as "you".
Activities other than copying, distribution and modification are not
covered by this License; they are outside its scope. The act of
running the Program is not restricted, and the output from the Program
is covered only if its contents constitute a work based on the
Program (independent of having been made by running the Program).
Whether that is true depends on what the Program does.
You may charge a fee for the physical act of transferring a copy, and
you may at your option offer warranty protection in exchange for a fee.
These requirements apply to the modified work as a whole. If
identifiable sections of that work are not derived from the Program,
and can be reasonably considered independent and separate works in
themselves, then this License, and its terms, do not apply to those
sections when you distribute them as separate works. But when you
distribute the same sections as part of a whole which is a work based
on the Program, the distribution of the whole must be on the terms of
this License, whose permissions for other licensees extend to the
entire whole, and thus to each and every part regardless of who wrote it.
Thus, it is not the intent of this section to claim rights or contest
your rights to work written entirely by you; rather, the intent is to
exercise the right to control the distribution of derivative or
collective works based on the Program.
In addition, mere aggregation of another work not based on the Program
with the Program (or with a work based on the Program) on a volume of
a storage or distribution medium does not bring the other work under
the scope of this License.
Accompany it with a written offer, valid for at least three
years, to give any third party, for a charge no more than your
cost of physically performing source distribution, a complete
machine-readable copy of the corresponding source code, to be
distributed under the terms of Sections 1 and 2 above on a medium
customarily used for software interchange; or,
Accompany it with the information you received as to the offer
to distribute corresponding source code. (This alternative is
allowed only for noncommercial distribution and only if you
received the program in object code or executable form with such
an offer, in accord with Subsection b above.)
The source code for a work means the preferred form of the work for
making modifications to it. For an executable work, complete source
code means all the source code for all modules it contains, plus any
associated interface definition files, plus the scripts used to
control compilation and installation of the executable. However, as a
special exception, the source code distributed need not include
anything that is normally distributed (in either source or binary
form) with the major components (compiler, kernel, and so on) of the
operating system on which the executable runs, unless that component
itself accompanies the executable.
If distribution of executable or object code is made by offering
access to copy from a designated place, then offering equivalent
access to copy the source code from the same place counts as
distribution of the source code, even though third parties are not
compelled to copy the source along with the object code.
If any portion of this section is held invalid or unenforceable under
any particular circumstance, the balance of the section is intended to
apply and the section as a whole is intended to apply in other
circumstances.
It is not the purpose of this section to induce you to infringe any
patents or other property right claims or to contest validity of any
such claims; this section has the sole purpose of protecting the
integrity of the free software distribution system, which is
implemented by public license practices. Many people have made
generous contributions to the wide range of software distributed
through that system in reliance on consistent application of that
system; it is up to the author/donor to decide if he or she is willing
to distribute software through any other system and a licensee cannot
impose that choice.
This section is intended to make thoroughly clear what is believed to
be a consequence of the rest of this License.
Each version is given a distinguishing version number. If the Program
specifies a version number of this License which applies to it and "any
later version", you have the option of following the terms and conditions
either of that version or of any later version published by the Free
Software Foundation. If the Program does not specify a version number of
this License, you may choose any version ever published by the Free Software
Foundation.
If you develop a new program, and you want it to be of the greatest
possible use to the public, the best way to achieve this is to make it
free software which everyone can redistribute and change under these terms.
To do so, attach the following notices to the program. It is safest
to attach them to the start of each source file to most effectively
convey the exclusion of warranty; and each file should have at least
the "copyright" line and a pointer to where the full notice is found.
Also add information on how to contact you by electronic and paper mail.
If the program is interactive, make it output a short notice like this
when it starts in an interactive mode:
You should also get your employer (if you work as a programmer) or your
school, if any, to sign a "copyright disclaimer" for the program, if
necessary. Here is a sample; alter the names:
This General Public License does not permit incorporating your program into
proprietary programs. If your program is a subroutine library, you may
consider it more useful to permit linking proprietary applications with the
library. If this is what you want to do, use the GNU Library General
Public License instead of this License.
prev: Customising Links
contents
next: Problems and frequently asked questions
Examples
This chapter presents several examples of Links browser control.
Run the browser and press the g key
. A dialog for entering a URL will
appear. Enter "www.linux.cz" into the dialog. Click "OK" and wait until
the page is displayed.
Invoke the menu by pressing ESC
, click on "View", click on "HTML
options", click on "Default codepage", select "Windows 1250" from the
menu, press ENTER
, tick the "Ignore charset info sent by server"
field and click "OK".
Invoke the menu by pressing ESC
, click "Setup", click "Network
options". Enter "proxy.local.net:8000" into the "HTTP proxy" and "FTP
proxy" fields and click on "OK".
Press /
: a dialogue for entering search text will appear. Enter
"cemetery" and click "OK". If the text occurs anywhere in the page, it
will be shown in inverse video.
Display the page "www.praha-mesto.cz", press s
. A window labeled
"Bookmark manager" will be displayed. Click "Folder", a dialogue will pop
up, enter "Cities" and click "OK". A directory labeled "Cities" will be
created. Move over the "Cities" directory and press +, the
directory will open. Click "Add": a dialogue for adding bookmarks will
appear. The URL will be already filled in. Change the name if you want.
Click "OK" and the bookmark will be added into the directory. You can
close the bookmark manager by clicking "Close".
links -g -driver x -mode hammer-5.forge.cz:0.0
prev: Examples
contents
next: Appendix 1: Links and Javascript
Problems and frequently asked questions
Solving problems
You forget to include the -g
switch in the command line. Run the
browser with this option.
Your environment variable DISPLAY
is not set and the browser doesn't
know to which X server it should connect. Set the DISPLAY
variable to
match your display, or run the browser with the -mode display
option,
where "display" determines your display.
This is a bug in SVGAlib and the design of virtual consoles in the Linux
kernel. Ask their authors to fix the bug.
We know about this problem. It's an error of SVGAlib, more precisely of
its kernel part, which crashes during console switches. The only solution
to the problem is that the authors of SVGAlib fix it. Therefore write an
e-mail to them so that they have a motivation.
Unfortunately you have a display that is not supported by Links. It may
be either a grayscale display, a display with a low number of colours (less
than 16), or it is not possible to set a private colour palette. The
program requires a colour display with at least 16 colours and a
possibility to set a private palette. This problem occurs in some
X-servers for Windows and unfortunately nothing can be done about it.
Because gpm
is used for reading the mouse and gpm
is
character-oriented. Text mode has fewer pixels than graphics mode,
which could lead to the mouse pointer moving very slowly. To prevent
this, the movement is
multiplied by a constant and therefore forms little steps.
Yes, patch gpm
to support graphics. Write to the gpm
authors that
they should build in graphics support. If you have administrator
privileges, apply the enclosed patch PATCH-gpm-1.20.0-smooth-cursor
on the gpm
sources. The patch is for the 1.20.0 version but it will
probably work with other versions too. Then recompile gpm
.
Yes, using the keys
F5
, F6
, F7
and F8
.
Because on the framebuffer there is no other way to read the mouse.
Try and see whether the mouse works in other applications on the console
(for example Midnight Commander). If it doesn't work,
this is not a fault in Links; your gpm
is installed improperly.
This is not caused by Links, but by the SSH connection, over which the
megabytes of image data have to be transfered. As all the data have to be
encrypted, it takes long time. Therefore do not use SSH but connect to the
X-server directly.
Because the arrows are used for scrolling. Use the z key. Left
arrow works only in text mode for backward compatibility with older
versions and Lynx.
You have probably changed the text font size or image zoom factor in HTML
options and the page is assuming a certain text size or image size.
If you want the page to be displayed correctly, set text size to 16 and
image magnification to 100
Because Links contains an active filter which
displays only the first frame of an animated GIF. Animated GIFs
don't provide any additional information and they
unnecessarily load the network during remote execution.
In Links the user is not pestered by
constantly flashing adverts and can concentrate on reading the text.
Furthermore expensive bandwidth is not wasted.
Blue text on a dark blue background is VERY hard to read.
When Links evaluates text as poorly legible, it displays the text with as
much color contrast as possible against the original background. Unfortunately
there are authors of web pages who think that this type of colouring makes their pages
look original and irresistible. With Links you
will be able to read them without problems.
This is intentional.
Background images don't provide any extra information and just
degrade the legibility of the text. If the background images were displayed,
the font cache would be overloaded, which would cause an
unnecessary slowdown. During execution on a remote computer over a network
the network bandwidth would be wasted spectacularly
, as practically
every letter would have to be transmitted repeatedly.
For example, for each occurence of the letter A, the whole
bitmap of the letter would have to be transmitted, as each occurence
would have a different background or the same background
shifted by a different number of pixels. This would render the browser
practically unusable for remote execution.
Frequently asked questions
How do I...
Quit the connection (with the back function or by stopping the download),
click "Kill all connections" in the menu and run the connection once more.
With the "Reload" function, or leave the page with the "Back" function,
click "Flush all caches" and load the page once more.
You can enlarge the letters in menus in the "Setup->
Miscellaneous
options" menu. Enter the desired pixel height into the "Menu font size"
field. Letters on pages can be enlarged in the "View->
HTML options"
menu in "User font size" field.
General questions
Not currently. But see Appendix 1.
Yes. But only in graphics mode.
The luminance generated by a physical device is generally not a linear function of the applied signal. A conventional CRT has a power-law response to voltage: luminance produced at the face of the display is approximately proportional to the applied voltage raised to the 2.5 power. The numerical value of the exponent of this power function is colloquially known as gamma. You can find
more on
http://www.inforamp.net/~poynton/notes/colour_and_gamma/GammaFAQ.html
To make it possible to display images. It's a bit difficult to display images
in text mode.
Because we like it and we want to view web pages with a good browser.
Because AAlib has mediocre resolution.
Because AAlib has a mediocre resolution.
No.
Because these toolkits take up too much space, are not portable, need not
necessarily be installed on every computer (why should a user install a
multimegabyte toolkit together with Links?), bring unnecessary program
slowdown, annoy with thousands of windows and are incompetent.
For example in GTK it is impossible to dictate the gamma with which the
dialogues should be displayed, and it is also impossible to scroll with the
middle mouse button in the file selection dialogue.
Because these don't have a practical use and just take up 1/5 of the
screen; effectively they make a 15-inch monitor out of a 17-inch one. This
feature will be appreciated especially by users of low resolution monitors,
for example 640x480.
Because there is no standardized interface for plugins; each
browser has its own. The plugins are also insecure in that a crash of
the plugin often causes a crash of the whole browser (which should not
happen!).
Appendix 1: Links and JavaScript
Javascript Options

prev: Links and Javascript
contents
Appendix 2: GNU general public licence
Accompany it with the complete corresponding machine-readable
source code, which must be distributed under the terms of Sections
1 and 2 above on a medium customarily used for software interchange; or,
Gnomovision version 69, Copyright (C) year  name of author
Gnomovision comes with ABSOLUTELY NO WARRANTY; for details type `show w'.
This is free software, and you are welcome to redistribute it
under certain conditions; type `show c' for details.

The hypothetical commands `show w' and `show c' should show the appropriate
parts of the General Public License.  Of course, the commands you use may
be called something other than `show w' and `show c'; they could even be
mouse-clicks or menu items--whatever suits your program.
Yoyodyne, Inc., hereby disclaims all copyright interest in the program
`Gnomovision' (which makes passes at compilers) written by James Hacker.
In addition, as a special exception, the copyright holders give
permission to link the code of portions of this program with the
OpenSSL library under certain conditions as described in each
individual source file, and distribute linked combinations
including the two.
You must obey the GNU General Public License in all respects
for all of the code used other than OpenSSL.  If you modify
file(s) with this exception, you may extend this exception to your
version of the file(s), but you are not obligated to do so.  If you
do not wish to do so, delete this exception statement from your
version.  If you delete this exception statement from all source
files in the program, then also delete it here.